How to install the LinkDrip pixel
Let's learn how to install a LinkDrip pixel on our website
Creating a new LinkDrip pixel
The first thing we need to do, is creating a new LinkDrip pixel.
LinkDrip pixels can be created under
Settings → Pixels.
They are specific to each
workspace.

Give your pixel a name and (optionally) a description and click Generate LinkDrip Pixel.
Once the pixel is generated, you will see a code snippet. You can click directly on this code snippet to copy it to the clipboard.

Add the LinkDrip Pixel to your website
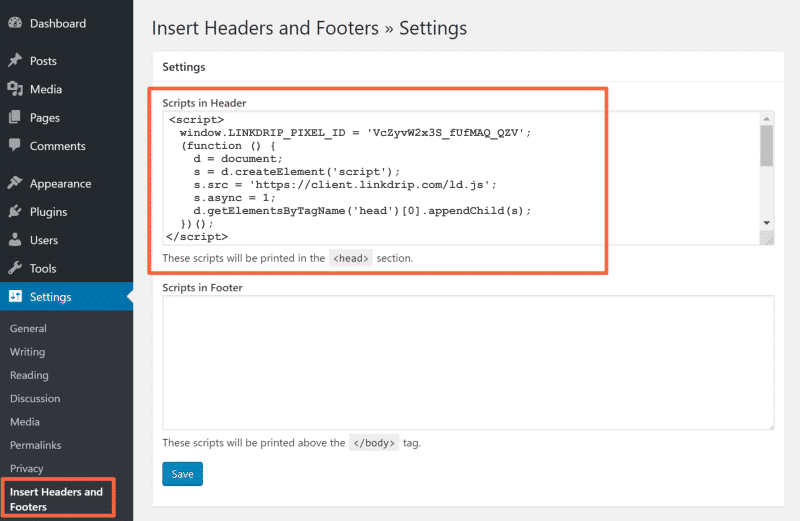
After copying the pixel code snippet, you can insert it on your website.
The best practice is to insert it in the head section of your website.

This is an example from WordPress.
It will look slightly different
depending on which website system you're using.
Table of Contents
Creating a new LinkDrip pixel
The first thing we need to do, is creating a new LinkDrip pixel.
LinkDrip pixels can be created under
Settings → Pixels.
They are specific to each
workspace.

Give your pixel a name and (optionally) a description and click Generate LinkDrip Pixel.
Once the pixel is generated, you will see a code snippet. You can click directly on this code snippet to copy it to the clipboard.

Add the LinkDrip Pixel to your website
After copying the pixel code snippet, you can insert it on your website.
The best practice is to insert it in the head section of your website.

This is an example from WordPress.
It will look slightly different
depending on which website system you're using.


